So several months ago I had decided that I was going to ask my girlfriend to marry me. BUT we have been together for 6.5 years at this point so I needed to make sure it was really memorable. The first step was to pick a ring. Thankfully I met a jeweller at
Modlab who 3D prints rings:
Fused Elements. Well, sort of. She 3D prints the ring in wax and then uses that to make a mould which she fills with molten metal. Upon hearing that I KNEW that's where I would get the ring. (Bonus: I can get the ring re-made in the event of catastrophic failures)
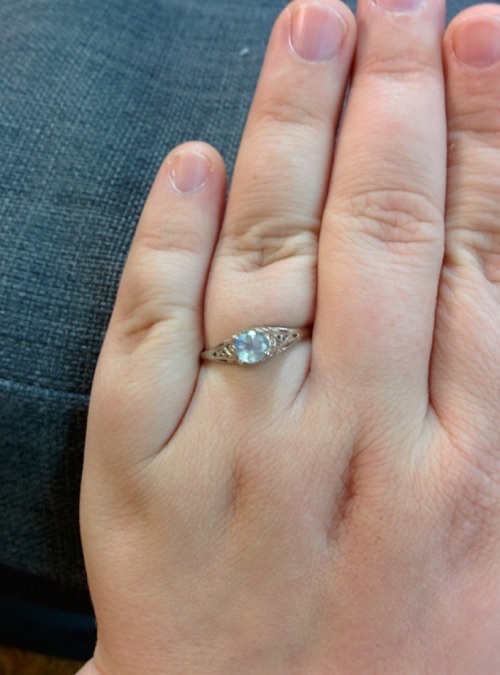
The ring!
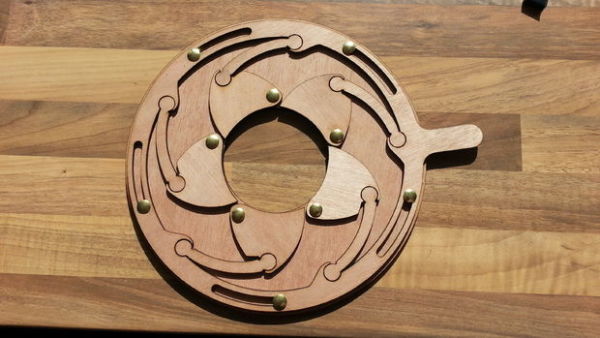
One day on reddit I saw this really fantastic ring box that someone had made involving a
mechanical iris that looked fantastic. You can check out the whole album of the build process here:
https://imgur.com/a/3Mu8J
After humming and hawing for a bit I came up with a plan to build a series of boxes to hold the ring. My fiancé likes unwrapping things so having many layers was essential. This was my first plan
But like all plans it fell apart as soon as it encountered reality.
STAGE 1.0
This is the only part of the plan that went off without a hitch! Working with Fused Elements was really easy and the ring turned out beautifully.
STAGE 2.0
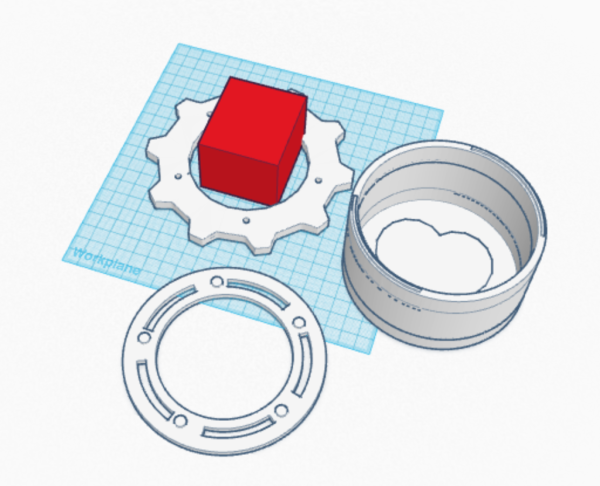
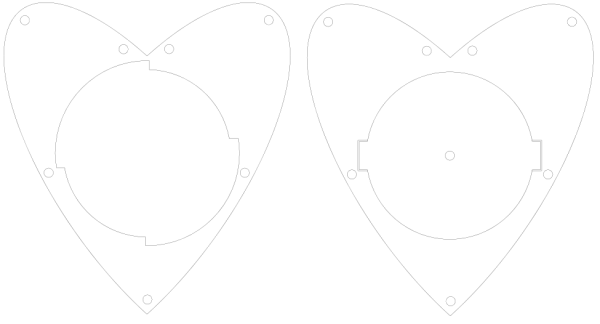
The first problem I encountered was modifying the existing 3d designs for the iris box so that the original ring box would fit. (A secondary problem was gaining access to a 3d printer, but thankfully a good friend of mine had recently acquired one). I had to enlarge the designs by close to 200% so that the box would fit through the inner ring of the iris. But in doing this I ended up with a box that had a truly gigantic outer diameter. It was getting close to 20cm and what was just stage 2!
Photo of the iris box I wanted to use at first.
TinkerCAD
(insert picture here)
STAGE 2.1
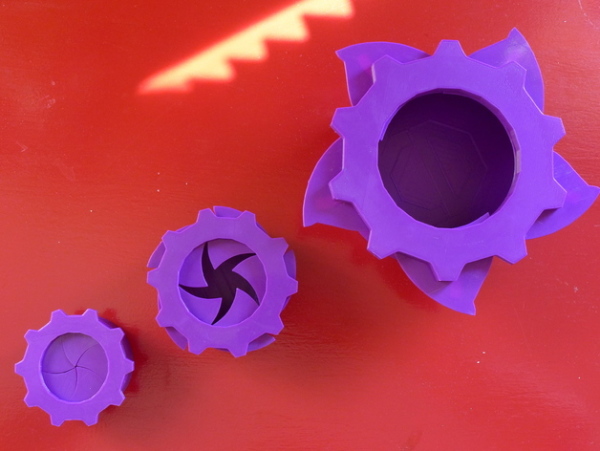
After many months of searching through thingiverse (I may be embellishing) I found this really cool looking
parametric twisted star box which had some openscad files I could modify and use.
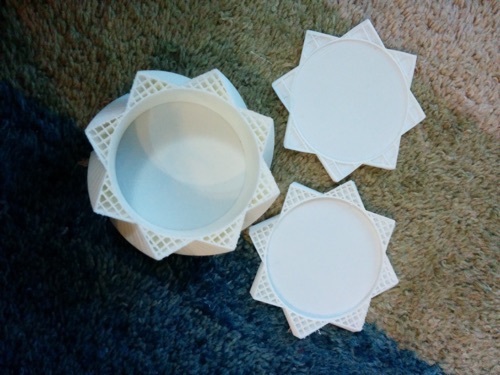
Printing this turned out to be quite an ordeal. My girlfriend was away for a weekend so I signed out the Ultimaker from Art Engine (my local makerspace) and started printing. But this box was actually pretty big and as anyone who's done any 3d printing will tell you, printers can be finicky. Here are the 3d aborted bases I have. Only one was intentional. The other too failed when the filament got twisted and stopped feeding properly.
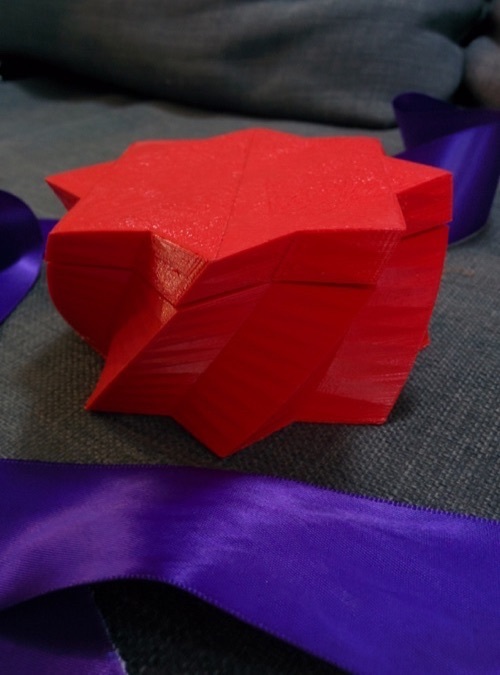
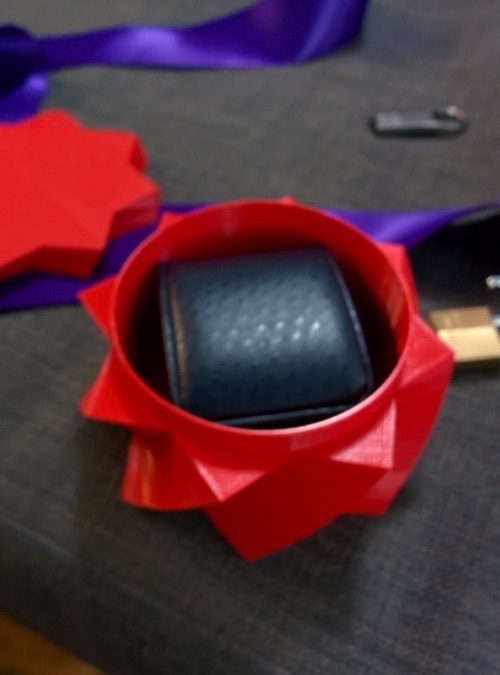
But 4th times the charm! You can see the finished box below
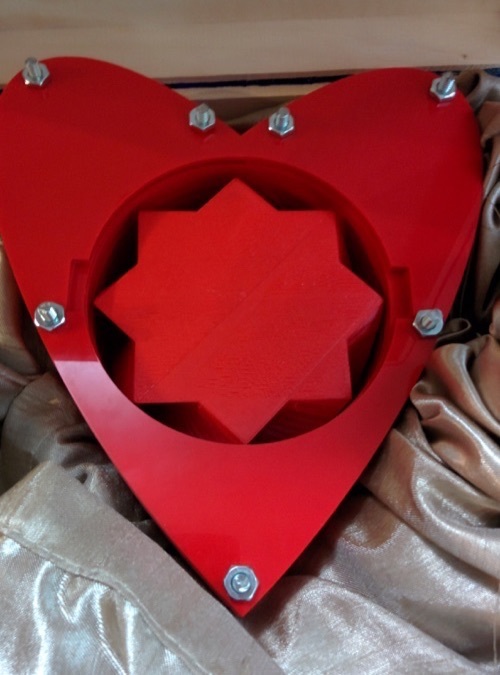
The ring box fits! I messed up a tiny bit in modifying the box. The lid should have had a slightly smaller opening at the top since where the twists meet there's a tiny bit of a gap.
STAGE 3.0
My initial plan was to have a second box with an mechanical iris based on this cool design I had found on Instructables (
http://www.instructables.com/id/Mechanical-iris-v20/?ALLSTEPS). That would make the lid and the rest of the box would be made by stacking sheets of material that I would cut into shape on a laser cutter and hold together with nuts and bolts.
But once again I completely under estimated how large this would end up making my box. Stage 2 had to fit through that inner hole and once I'd scaled up the design it wouldn't fit on the bed of the laser cutter any more...
STAGE 3.1
I needed to make this piece just as special as the other stages so I ended up choosing to make the box heart shaped. Not just regular heart shaped, but a heart based on the equation y=|x|+sqrt(1-x²) and y=|x|-sqrt(1-x²) from -1 to 1 (graphed on
Wolfram Alpha). When my fiancé and I first started dating I liked to show off so I had sent her that equation. She liked it enough to have a large poster of it made for her bedroom.
With a shaped picked out I started designing the box itself in inkscape. You can see the end result below.
As I was working on the design I needed to pick the material I wanted to use. I ended up choosing 1/8" opaque red acrylic. I probably should have figured out where to get some before setting my heart on it though... I ended up calling a the following places in Ottawa that sell acrylic to try and find some:
- Canus Plastics
- Laird Plastics
- Plastics & Signs of Ottawa
I ended up going with Laird because they could get it for me in a week. The only problem I ran into here was that I had to order an entire 4' x 8' sheet of red acrylic... Thankfully Laird cut it into 2' x 1' sheets for me. Transporting a sheet of material that huge is difficult on a bike and I can only fit a 2' x 1' sheet in the laser cutter anyway.
After picking up the sheets I started prototyping my final design in cardboard. I cut out 5 hearts in cardboard and checked that the holes I had cut fit the screws, and that stage 2 would fit in the whole properly. Everything seemed to be perfect so I cut out a single heart in acrylic. It fit the box and the screws slid through the holes. So I cut out the rest of the hearts I could on that first sheet of acrylic and...
They didn't fit together. This is the first time I learned about the importance of tolerances. The bolt holes needed to have more clearance. So I modified the designs to add an extra few mm of clearance. I cut out another sheet of hearts and tried putting them together. They fit together perfectly! So I cut another sheet and... promptly ran into problems with tolerances again. Thankfully I was able to wiggle the second sheet worth of hearts down so at least I didn't waste any hearts, but for the next couple batches I increased the bolt hole size again.
The last part of this stage was to come up with a lid. Initially, I envisioned using a gear shape for the lid and having a second lower layer that was that had a hole same upper gear shape except cut out again after having been rotated a bit. This way the lid would slide down a layer and could rotate about a gear tooth's worth.
Turns out doing that is hard. Most of the gears that I could generate were meant to be used as actual gears, I needed something more aesthetically pleasing. I ended up going with a simplified version of the above design. I had a circle with two small tabs offset by 180 degrees. Below it I had a circular whole with two quarters of a larger circle cut out so that the tabs of the lid could rotate.
This is the design I went with, but it suffers from a few... problems. The second layer cut out should be a bit bigger so that the lid can rotate better. Also the lid needs to be a bit smaller. I also went with an acrylic handle that I cut out, but I think a set of finger sized holes in the lid would work even better.
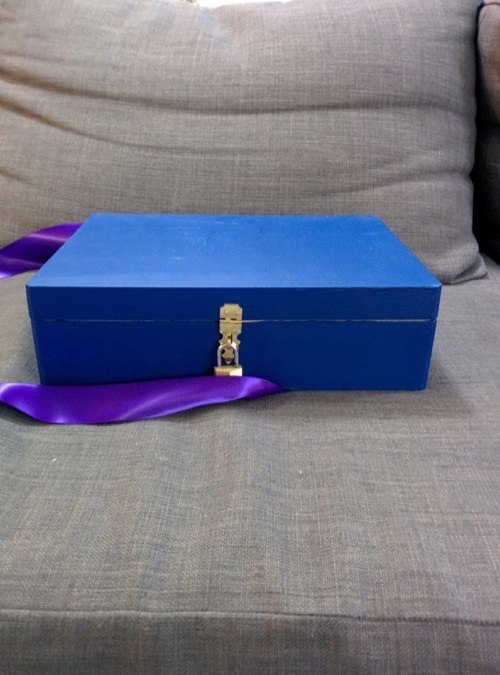
Anyway, here's the final product:
STAGE 4.0
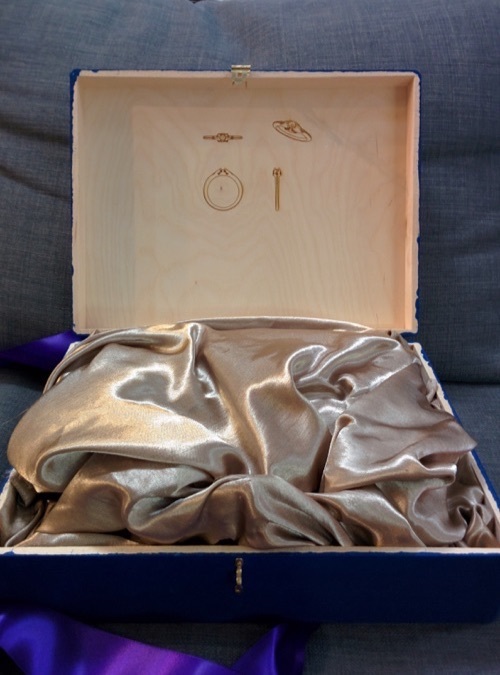
Now that I had dimensions from stage 3.1 I could try and come up with a box that would fit it. I wanted something wooden, but it turns out that finding a large wooden box in Ottawa is kinda hard. I ended up going with the largest one that they had at Michael's and painting Tardis blue.
A few months earlier I had given my girlfriend a key in order to get her excited. I needed some way to attach a latch to the box. I was super concerned that I wouldn't be able to find something that would work, but I got lucky and they had one that worked perfectly at the hardware store.
I also wanted to use some of the design files I had gotten from Fused Elements, so I decided to engrave them with the laser cutter on the lid of stage 4. It turned out really well, although I did have to come up with a way to have the lid stay flat while still attached to the base.
I hope you dear reader might be inspired in your own proposals (if that's your thing) just as I was when I saw the CNC'd Iris box.